dnstt
dnstt is a DNS tunnel that can use DNS over HTTPS (DoH) and DNS over TLS (DoT) resolvers.
A DNS tunnel is one way of circumventing network censorship. A recursive DNS resolver's purpose is to receive packets and forward them somewhere else—in effect, working as a kind of network proxy. DNS tunnels over plaintext UDP are generally considered easy to detect because of the unusual DNS messages they use. However DoH and DoT are encrypted—an outside observer can see that you are communicating with a public resolver, but cannot decrypt the raw DNS messages to see that they embed a tunnel protocol. (The resolver itself can still easily tell that you are using a tunnel.)

dnstt uses end-to-end encryption and authentication between the tunnel client and tunnel server by default. Its protocol design enables higher performance than other DNS tunnels.
Idea: DNS-over-HTTP transport, .
Original announcement thread, .
Last updated: .
Download
git clone https://www.bamsoftware.com/git/dnstt.git
dnstt-20260501.zip (signature, public key)
Online source code browser (gitweb)
The code is written in Go. dnstt is in the public domain.
How to set it up
dnstt doesn't offer a TUN/TAP network interface, or even a SOCKS or HTTP proxy interface, only a netcat-like connection between a local TCP socket and a remote TCP socket. However, it's fairly easy to make the tunnel act like a standard proxy server by running a proxy at the tunnel server.
A DNS tunnel works by having the tunnel server act as an authoritative resolver for a specific domain name. The recursive resolver in the middle acts as a proxy by forwarding queries for that domain to the tunnel server. To set up a DNS tunnel, you need a domain name and a host that can receive UDP packets, where you run the tunnel server. In these instructions, we'll assume the following example setup:
| Your domain name | example.com |
|---|---|
| Your server's IPv4 address | 203.0.113.2 |
| Your server's IPv6 address | 2001:db8::2 |
DNS setup
Go into your name registrar's configuration panel and add three records:
| A | tns.example.com | points to | 203.0.113.2 |
| AAAA | tns.example.com | points to | 2001:db8::2 |
| NS | t.example.com | is managed by | tns.example.com |
tns.example.com points to the addresses of your tunnel server. It is marked as being the nameserver for everything in the t.example.com DNS zone. When a recursive resolver receives a query for subdomain.t.example.com, it will forward the query to the tunnel server—that is how the client tunnels data to the server.
The "tns" and "t" labels can be anything you want, but the "tns" label should not be a subdomain of the "t" label (everything under that subdomain is reserved for tunnel payloads). The "t" label should be short, because there is limited space available in a DNS message, and the domain name takes up part of it.
Tunnel server setup
tunnel-server$ cd dnstt/dnstt-server
tunnel-server$ go build
First you need to generate private and public keys for the end-to-end tunnel encryption.
tunnel-server$ ./dnstt-server -gen-key -privkey-file server.key -pubkey-file server.pub
privkey written to server.key
pubkey  written to server.pub
Now run the server. 127.0.0.1:8000 is the TCP address to which incoming tunnelled streams will be forwarded ("remote app" in the diagram).
tunnel-server$ ./dnstt-server -udp :5300 -privkey-file server.key t.example.com 127.0.0.1:8000
The tunnel server needs to be reachable on UDP port 53.
You could have it bind to port 53 directly (-udp :53),
but that would require you to run the server as root.
It's better to run the server on a non-privileged port as shown above,
and use port forwarding to forward port 53 to it.
On Linux, these commands will forward port 53 to port 5300:
tunnel-server$ sudo iptables -I INPUT -p udp --dport 5300 -j ACCEPT
tunnel-server$ sudo iptables -t nat -I PREROUTING -i eth0 -p udp --dport 53 -j REDIRECT --to-ports 5300
tunnel-server$ sudo ip6tables -I INPUT -p udp --dport 5300 -j ACCEPT
tunnel-server$ sudo ip6tables -t nat -I PREROUTING -i eth0 -p udp --dport 53 -j REDIRECT --to-ports 5300
You need something at 127.0.0.1:8000 for the tunnel server to connect to. Down below there are instructions for running a proxy server. For testing purposes, you can use an Ncat listener to print incoming data to the terminal:
tunnel-server$ sudo apt install ncat
tunnel-server$ ncat -l -k -v 127.0.0.1 8000
Ncat: Version 7.70 ( https://nmap.org/ncat )
Ncat: Listening on 127.0.0.1:8000
By default, dnstt-server assumes that the recursive resolver
supports DNS responses up to a certain size, namely 1232 bytes.
If your chosen resolver does not support responses that large
(there will be error messages in the server output),
you can specify a smaller limit using the -mtu
option, for example -mtu 512.
Tunnel client setup
tunnel-client$ cd dnstt/dnstt-client
tunnel-client$ go build
Copy server.pub (the public key file) from the server to the client. You don't need server.key (the private key file) on the client.
Choose a DoH or DoT resolver.
- DoH resolvers
- DoT resolvers
To use a DoH resolver, use the -doh option:
tunnel-client$ ./dnstt-client -doh https://doh.example/dns-query -pubkey-file server.pub t.example.com 127.0.0.1:7000
To use a DoT resolver, use -dot:
tunnel-client$ ./dnstt-client -dot dot.example:853 -pubkey-file server.pub t.example.com 127.0.0.1:7000
127.0.0.1:7000 is the client end of the tunnel ("local app" in the diagram). Anything that connects to that port on the tunnel client will be tunnelled through the public resolver and connected to 127.0.0.1:8000 on the tunnel server. You can test it using an Ncat client. Run this command, and anything you type into the client terminal will appear on the server, and vice versa.
tunnel-client$ ncat -v 127.0.0.1 7000
How to integrate with a proxy server
dnstt is only a tunnel; it's up to you what you want to connect to it. You can make the tunnel work like an ordinary SOCKS or HTTP proxy by having the tunnel server forward to a standard proxy server. There are many ways to set it up; here are some examples.
Ncat HTTP proxy
For testing, I find it convenient to use Ncat's HTTP proxy server mode. But be aware that Ncat's proxy isn't intended for use by untrusted clients; it won't prevent them from connecting to localhost ports on the tunnel server, for example.
tunnel-server$ ncat -l -k --proxy-type http 127.0.0.1 8000
tunnel-server$ ./dnstt-server -udp :5300 -privkey-file server.key t.example.com 127.0.0.1:8000
tunnel-client$ ./dnstt-client -doh https://doh.example/dns-query -pubkey-file server.pub t.example.com 127.0.0.1:7000
On the client, configure applications to use the local end of the tunnel (127.0.0.1:7000) as an HTTP/HTTPS proxy.
tunnel-client$ curl --proxy http://127.0.0.1:7000/ https://wtfismyip.com/text
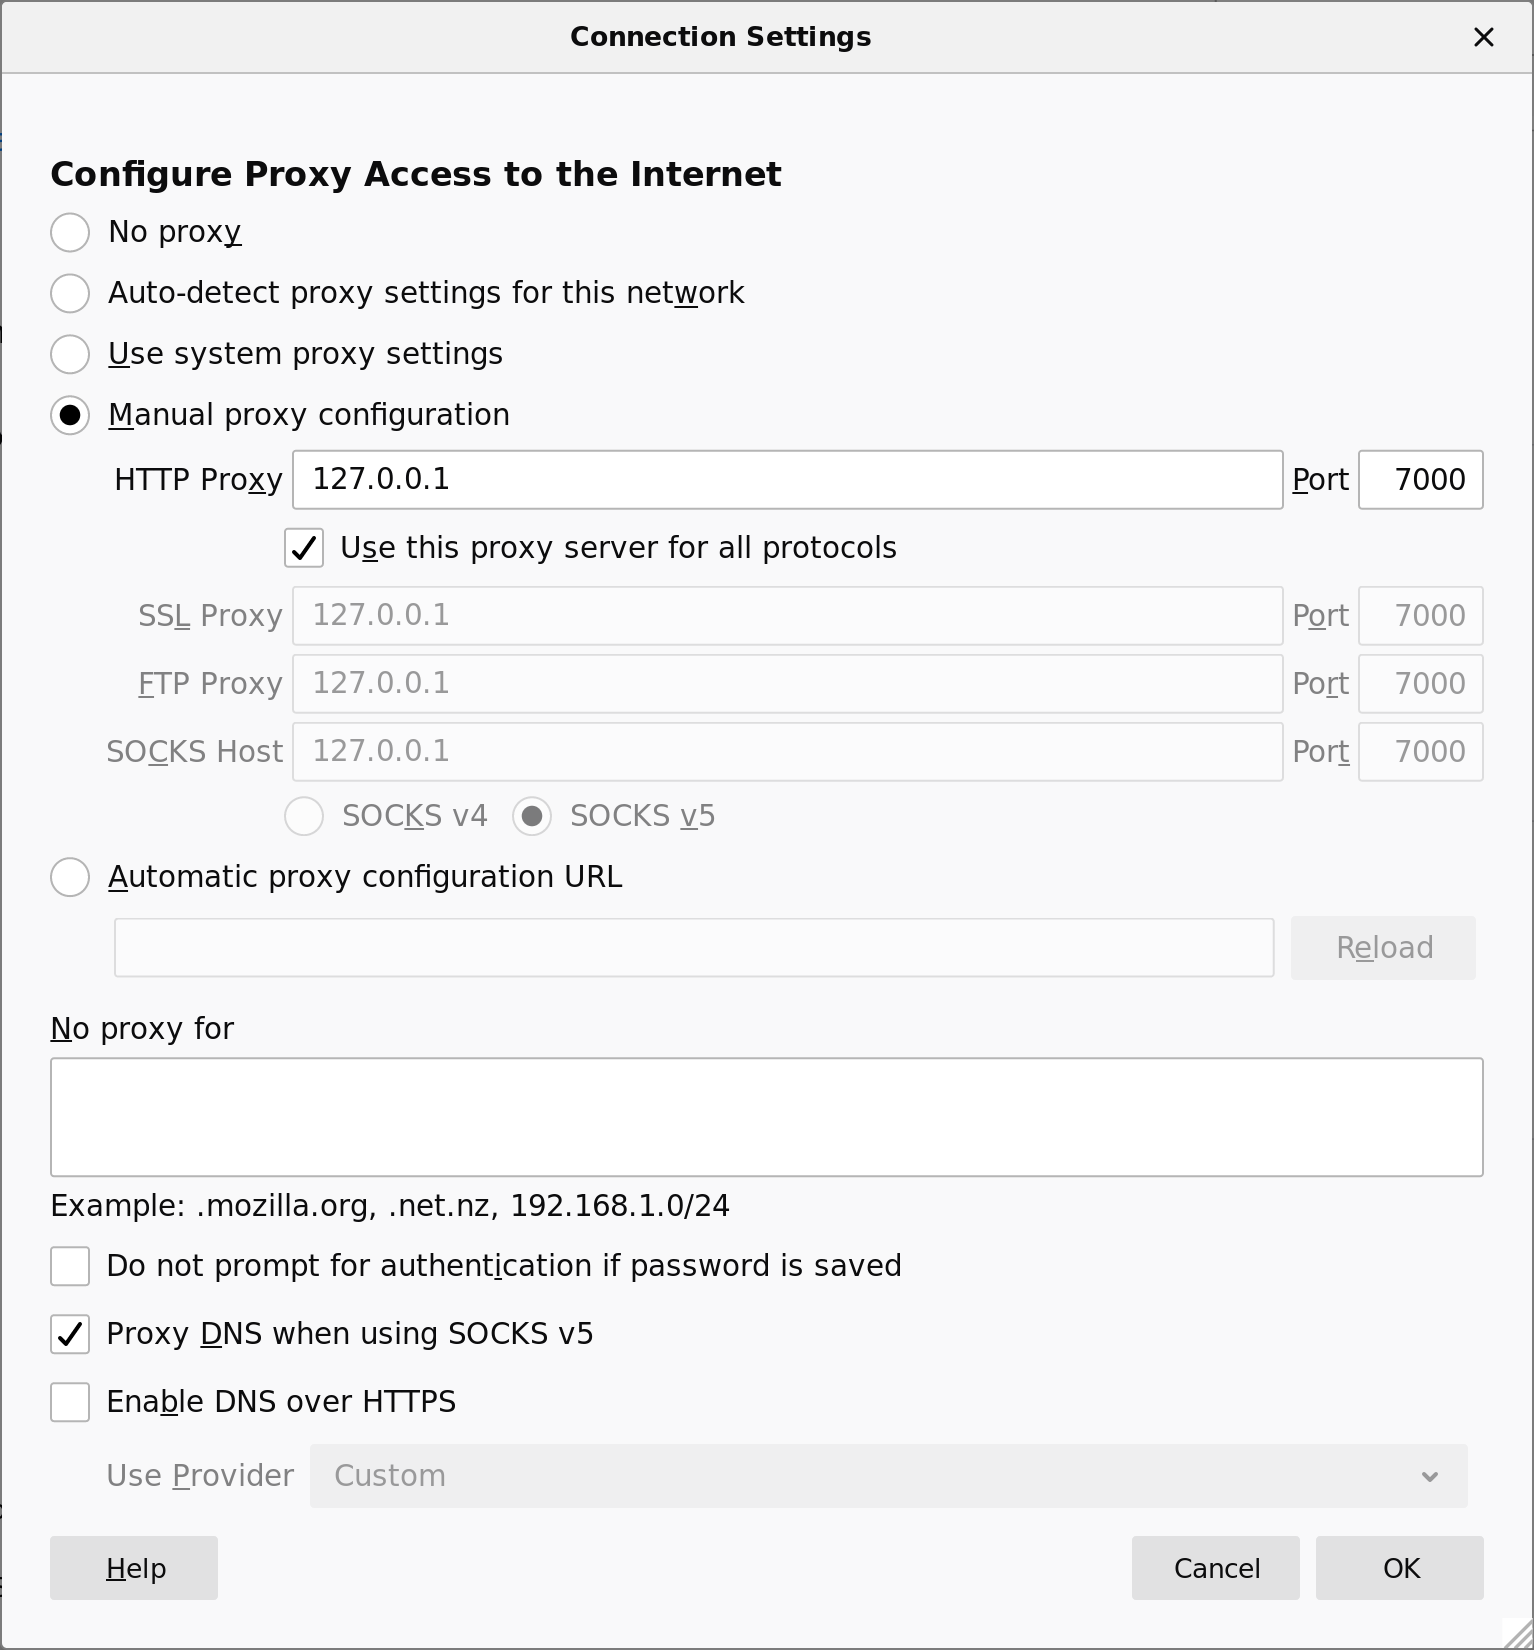
Configuring an HTTP/HTTPS proxy in Firefox 68. Go to Preferences, General, then Network Settings.
SSH SOCKS proxy
OpenSSH has a built-in SOCKS proxy, which makes it easy to add a SOCKS proxy to a server that already has sshd installed.
On the server, make a localhost SSH connection, using the
-D
option to open a SOCKS listener at port 8000.
Then configure the tunnel server to forward incoming connections to port 8000.
Have the tunnel client listen on its own local port 7000.
tunnel-server$ ssh -N -D 127.0.0.1:8000 -o NoHostAuthenticationForLocalhost=yes 127.0.0.1
# Enter the password of the local user on tunnel-server
tunnel-server$ ./dnstt-server -udp :5300 -privkey-file server.key t.example.com 127.0.0.1:8000
tunnel-client$ ./dnstt-client -doh https://doh.example/dns-query -pubkey-file server.pub t.example.com 127.0.0.1:7000
On the client, configure applications to use the local end of the tunnel (127.0.0.1:7000) as a SOCKS proxy.
tunnel-client$ curl --proxy socks5h://127.0.0.1:7000/ https://wtfismyip.com/text
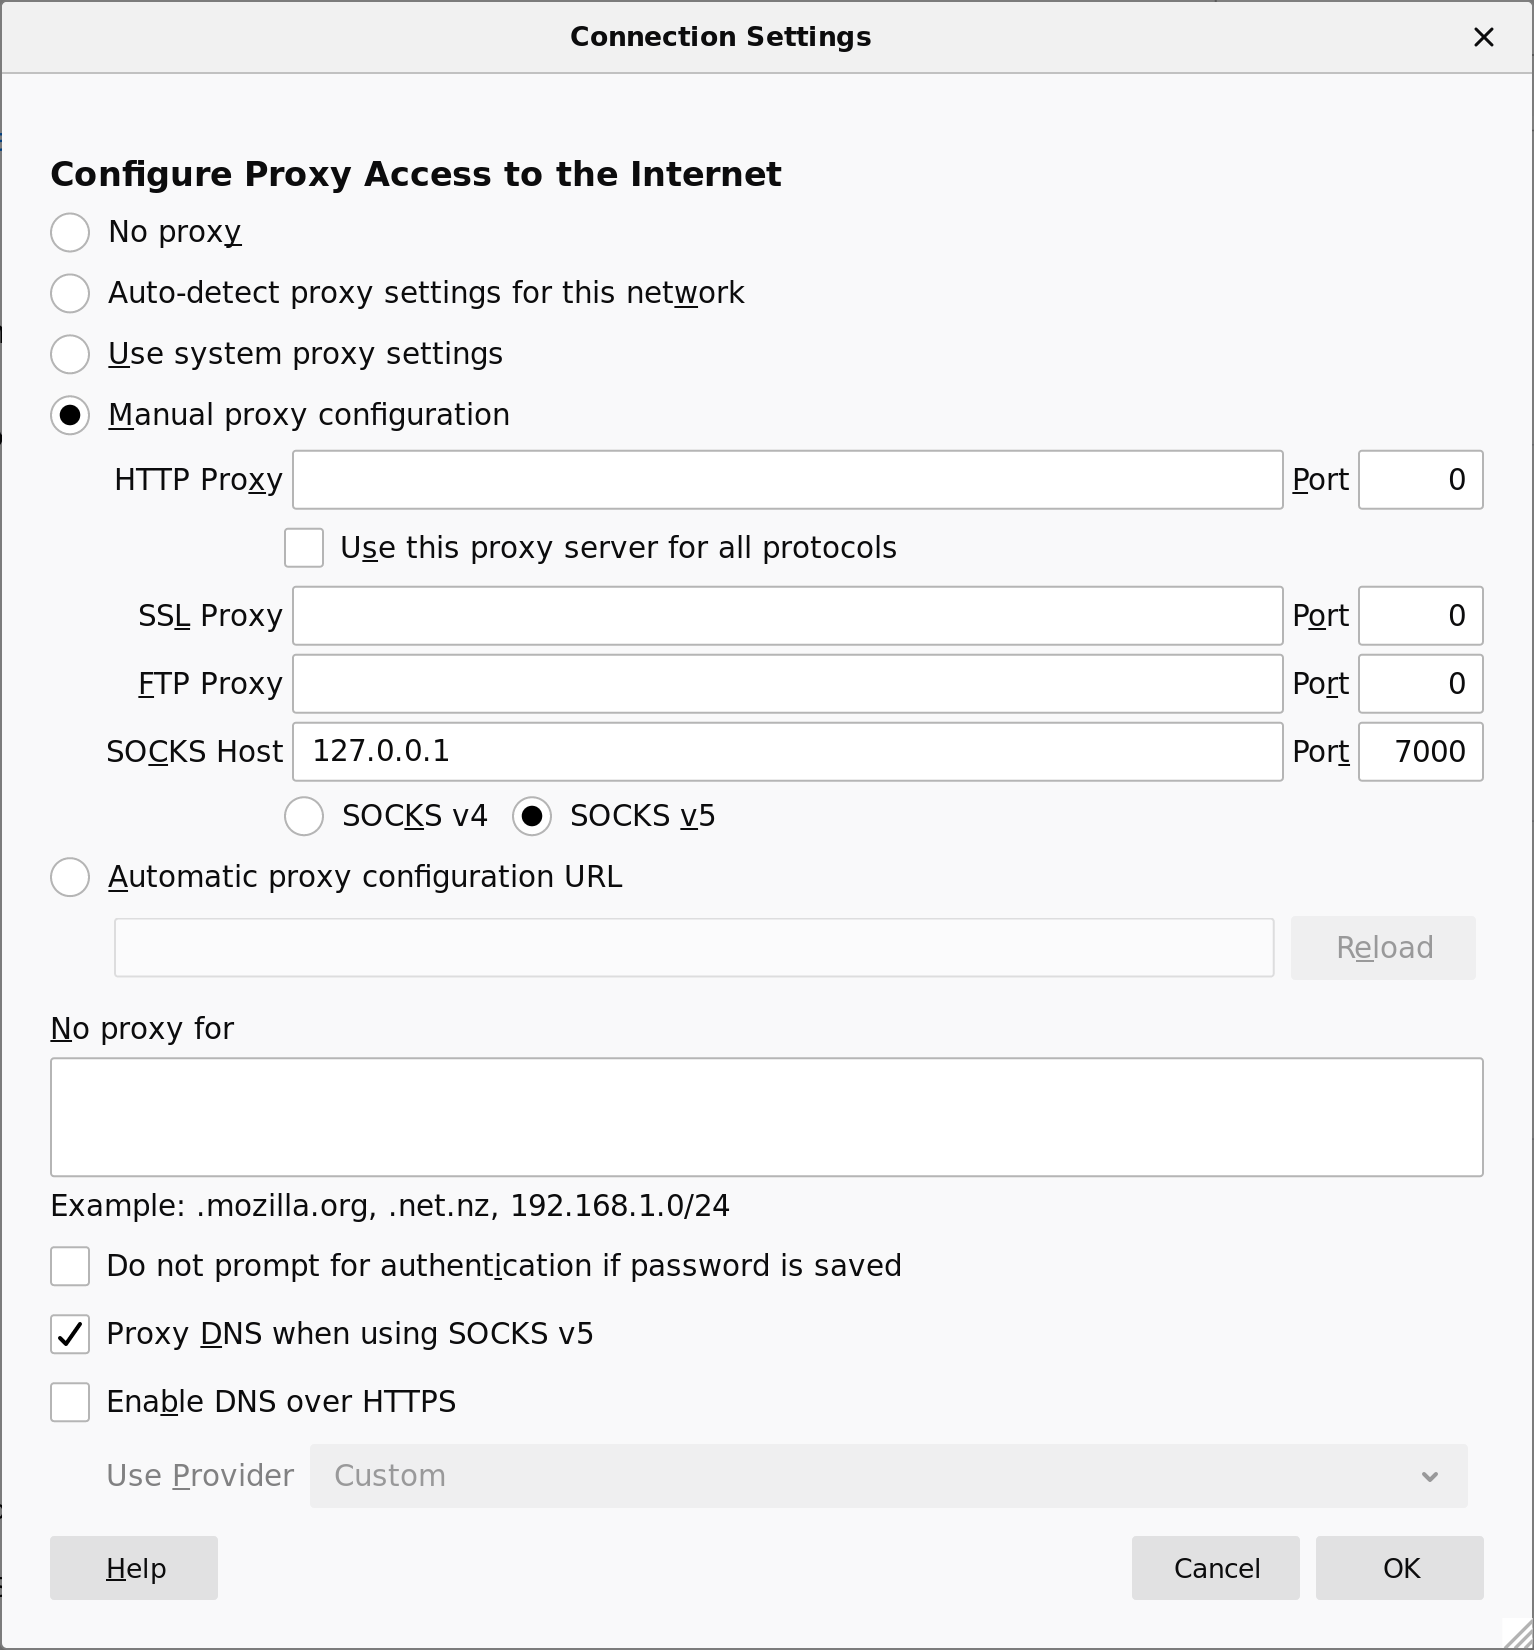
Configuring a SOCKS proxy in Firefox 68. Go to Preferences, General, then Network Settings.
The above configuration, by locating the SOCKS client port on the server, makes a SOCKS proxy that can be used by anyone with access to the DNS tunnel. Alternatively, you can make an SSH SOCKS proxy for your own private use, with the SSH connection going through the tunnel and the SOCKS client port being located at the client.
Let's assume you already have the SSH details configured so that you can run
ssh tunnel-server on the tunnel client.
Make sure
AllowTcpForwarding
is set to yes (the default value) in sshd_config
on the server.
Run the tunnel server and have it forward directly to the SSH port.
# sshd is already running at port 22
tunnel-server$ ./dnstt-server -udp :5300 -privkey-file server.key t.example.com 127.0.0.1:22
Run the tunnel client with the local listening port at 127.0.0.1:8000.
The
HostKeyAlias
ssh option lets you connect to the SSH server as if
it were located at 127.0.0.1:8000.
Replace tunnel-server with the hostname or IP address of the SSH server.
tunnel-client$ ./dnstt-client -doh https://doh.example/dns-query -pubkey-file server.pub t.example.com 127.0.0.1:8000
tunnel-client$ ssh -N -D 127.0.0.1:7000 -o HostKeyAlias=tunnel-server -p 8000 127.0.0.1
Dante SOCKS proxy
With the Dante SOCKS proxy, a minimal configuration (/etc/danted.conf) may look like the following:internal: lo port = 8000
external: eth0
clientmethod: none
socksmethod: none
user.privileged: proxy
user.unprivileged: nobody
client pass {
from: lo to: 0/0
}
socks block {
from: 0.0.0.0/0 to: lo
}
socks block {
from: ::/0 to: lo
}
socks pass {
from: lo to: 0.0.0.0/0
command: connect
}
See the server configuration documentation
for more examples.
Tor bridge
You can run a Tor bridge on the tunnel server and tunnel the connection to the bridge with dnstt, using dnstt as something like a pluggable transport. The Tor client provides a SOCKS interface that other programs can use.
Have the tunnel server forward to the Tor ORPort:
# tor is already running at port 9001
tunnel-server$ ./dnstt-server -udp :5300 -privkey-file server.key t.example.com 127.0.0.1:9001
Have the tunnel client open a local listener at 127.0.0.1:7000. Connections to this port will be forwarded to the bridge's ORPort through the tunnel.
tunnel-client$ ./dnstt-client -doh https://doh.example/dns-query -pubkey-file server.pub t.example.com 127.0.0.1:7000
Add a
Bridge line to
/etc/tor/torrc (if you use a system Tor), or
paste it into Tor Browser.
If you use a system Tor, restart the Tor daemon.
You can get FINGERPRINT from
the file /var/lib/tor/fingerprint on the bridge.
Bridge 127.0.0.1:7000 FINGERPRINT
Configure applications to use the Tor SocksPort as a SOCKS proxy. If you use a system Tor, the SocksPort is 127.0.0.1:9050; if you use Tor Browser, the SocksPort is 127.0.0.1:9150.
tunnel-client$ curl --proxy socks5://127.0.0.1:9050/ https://wtfismyip.com/text
tunnel-client$ curl --proxy socks5://127.0.0.1:9150/ https://wtfismyip.com/text
Original post (): How to run Tor Browser through a DoH/DoT tunnel.
Shadowsocks SIP003 plugin
SIP003 is a specification for obfuscation plugins in Shadowsocks. There are proof-of-concept Bash scripts to make dnstt work as a SIP003 plugin, so you can use Shadowsocks through a DNS tunnel. There's a fork of the dnstt code that has these scripts included, and a port to Android as a Shadowsocks plugin.
Original post ().
Protocol
See the protocol page.
The "tt" in dnstt stands for Turbo Tunnel, a design paradigm for circumvention protocols. It just means that embeds a sequencing and reliability layer, independent of the DNS transport.
I made a survey of the protocols of some other DNS tunnels.
Performance
See the performance page.
Security
See the security page.
Caveats
dnstt does not do any traffic shaping or padding, though I tried to design the protocol to support it. It is prudent to assume that an observer can infer that a DNS tunnel is being used, despite DoH or DoT encryption, by looking at traffic metadata features such as packet timing and volume.
The tunnel client and server support an unencrypted
-udp mode, which is trivially detectable
by a third-party observer using something as simple as a static pattern match.
Only the -doh and -dot modes are encrypted
and offer any chance of being covert.
Acknowledgements
Thanks to kcp-go, smux, Noise and its mailing list, the Flynn implementation of Noise, ValdikSS, and net4people/bbs and NTC correspondents. This software was developed under a contract with the Counter-Power Lab at UC Berkeley.
Paul Janiszewski, Carmen Kwan, Shela Qiu, and Cathy Wang developed a prototype integration of uTLS into dnstt. They and Cecylia Bocovich did research on distinguishing DNS tunnel traffic from browser DNS traffic.
Several members of the Cure53 team performed a 15-day security audit of dnstt in February and March 2021. Thanks to Jonathan Rudenberg and Nathan Brown for helping to coordinate fixes to bugs in an upstream dependency found by the audit.
See also
Slipstream, which builds on the idea of dnstt, using QUIC and QUIC congestion control for better performance.